Authorization code flow
The authorization code flow is the three-legged OAuth/OpenID Connect flow. The sequence diagram below describes the participants and their interactions for this usage scenario, including the use of session cookies:
sequenceDiagram
    autonumber
    participant client as Client
(e.g. mobile app)
    participant kong as API Gateway
(Kong)
    participant idp as IDP
(e.g. Keycloak)
    participant httpbin as Upstream
(backend service,
 e.g. httpbin)
    activate client
    activate kong
    client->>kong: HTTP request
    kong->>client: Redirect mobile app to IDP
    deactivate kong
    activate idp
    client->>idp: Request access and authentication
with client parameter
    Note left of idp: /auth
response_type=code,
scope=openid
    idp->>client: Login (ask for consent)
    client->>idp: /auth with user credentials (grant consent)
    idp->>client: Return authorization code and redirect
    Note left of idp: short-lived authcode
    activate kong
    client->>kong: HTTP redirect with authorization code
    deactivate client
    kong->>kong: Verify authorization code flow
    kong->>idp: Request ID token, access token, and refresh token
    Note left of idp: /token
client_id:client_secret
authcode
    idp->>idp: Authenticate client (Kong)
and validate authcode
    idp->>kong: Returns tokens
    Note left of idp: ID token, access token, and refresh token
    deactivate idp
    kong->>kong: Validate tokens
    Note right of kong: Cryptographic
signature validation,
expiry check
(OIDC Standard JWT validation)
    activate client
    kong->>client: Redirect with session cookie
having session ID (SID)
    Note left of kong: sid: cryptorandom bytes
(128 bits)
& HMAC protected
    client->>kong: Authenticated request with session cookie
    deactivate client
    kong->>kong: Verify session cookie
    Note right of kong: Retrieve encrypted tokens
from session store (redis)
    activate httpbin
    kong->>httpbin: Backend service request with tokens
    Note right of idp: Access token and ID token
    httpbin->>kong: Backend service response
    deactivate httpbin
    activate client
    kong->>client: HTTP response
    deactivate kong
    deactivate client
If using PKCE, the identity provider must contain the
code_challenge_methods_supportedobject in the/.well-known/openid-configurationissuer discovery endpoint response, as required by RFC 8414. If it is not included, the PKCEcode_challengequery parameter will not be sent.
Prerequisites
In most cases, the OpenID Connect plugin relies on a third party identity provider (IdP). The examples in this guide use Keycloak as a sample IdP.
Expand the following sections to configure Keycloak and Kong Gateway.
Configure Keycloak
All the *.test domains in the following examples point to the localhost (127.0.0.1 and/or ::1).
We use Keycloak as the identity provider in the following examples, but the steps will be similar in other standard identity providers. If you encounter difficulties during this phase, refer to the Keycloak documentation.
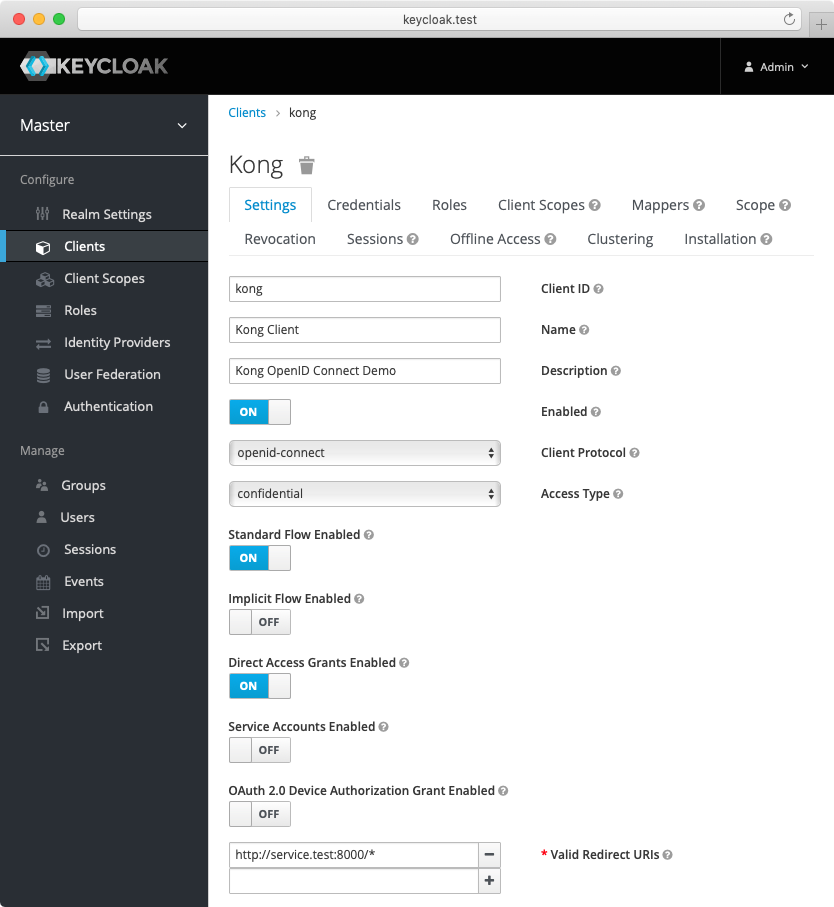
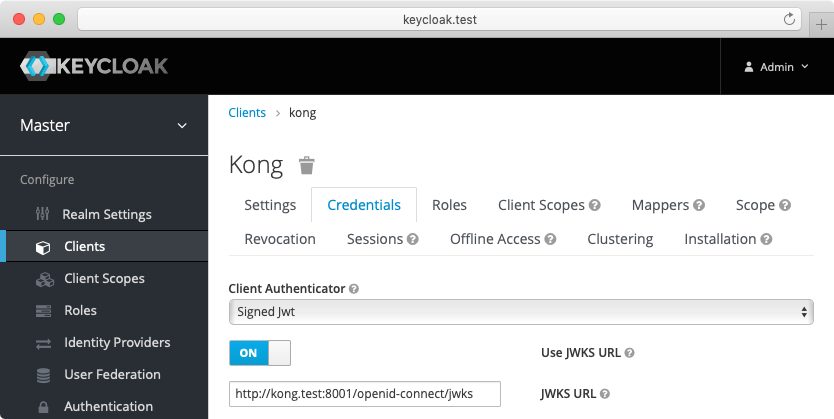
- Create a confidential client
kongwithprivate_key_jwtauthentication and configure Keycloak to download the public keys from [the OpenID Connect Plugin JWKS endpoint][json-web-key-set]:
-
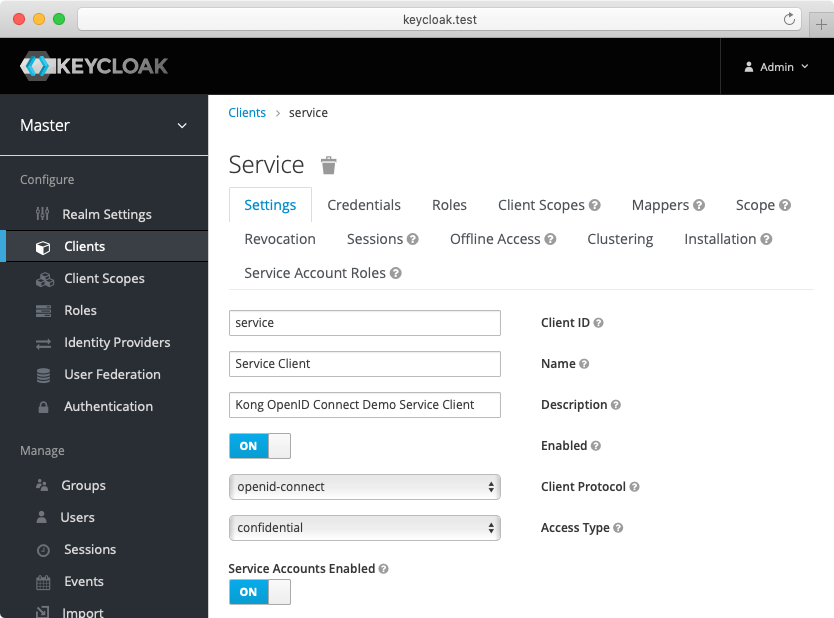
Create another confidential client
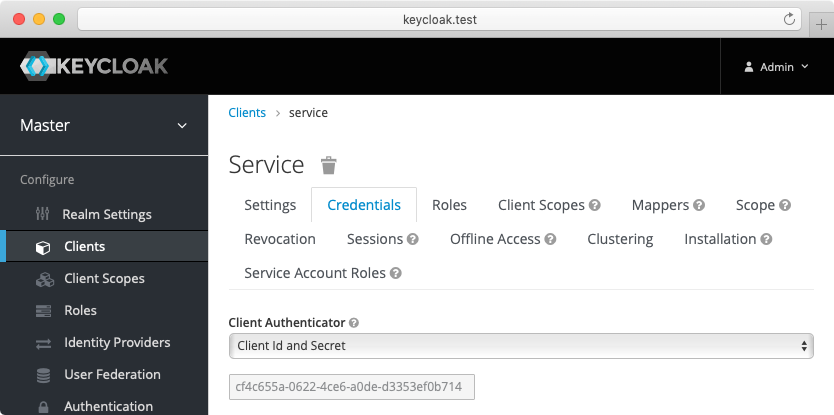
servicewithclient_secret_basicauthentication. For this client, Keycloak will auto-generate a secret similar to the following:cf4c655a-0622-4ce6-a0de-d3353ef0b714. Enable the client credentials grant for the client:
-
(Optional) Create another confidential client
cert-boundwith settings similar to theserviceclient created previously. From the Advanced tab, enable the OAuth 2.0 Mutual TLS Certificate Bound Access Tokens Enabled toggle. -
(Optional, to test mTLS Client Authentication) Create another confidential client
client-tls-authwith settings similar to theserviceclient created above. From the Credentials tab, select the X509 Certificate Client Authenticator and fill the Subject DN field so that it matches the Kong client certificate’s, e.g.:CN=JohnDoe, OU=IT. -
(Optional, to test Demonstrating Proof-of-Possession Client Authentication) Create another confidential client
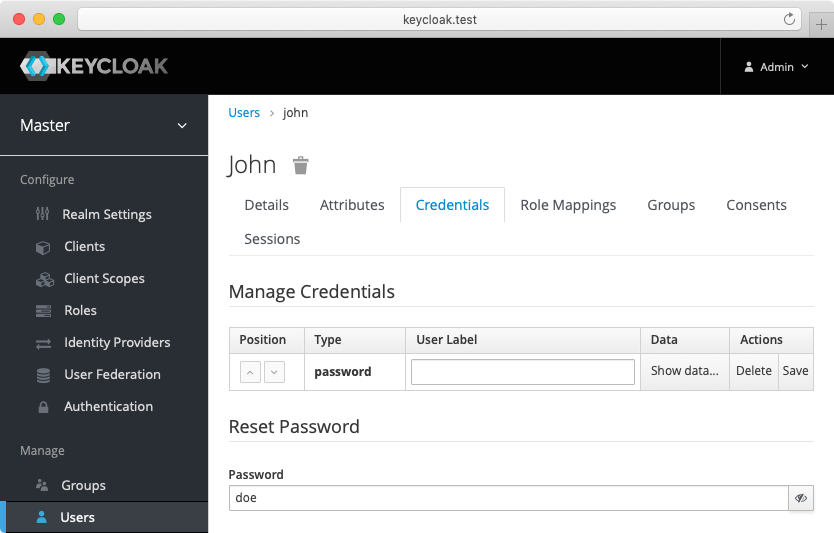
client-dpop-authwith settings similar to theserviceclient created above. From the Advanced tab, enable theOAuth 2.0 DPoP Bound Access Tokens Enabled toggle. - Create a verified user with the name:
johnand the non-temporary password:doethat can be used with the password grant:
Alternatively you can download the exported Keycloak configuration, and use it to configure the Keycloak. Please refer to Keycloak import documentation for more information.
You need to modify Keycloak standalone.xml configuration file, and change the socket binding from:
<socket-binding name="https" port="${jboss.https.port:8443}"/>
to
<socket-binding name="https" port="${jboss.https.port:8440}"/>
The Keycloak default https port conflicts with the default Kong TLS proxy port,
and that can be a problem if both are started on the same host.
Note: The mTLS Client Authentication, along with the proof of possession feature that validates OAuth 2.0 Mutual TLS Certificate Bound Access Tokens, both require configuring Keycloak to validate client certificates with mTLS using the
--https-client-auth=requestoption, and to configure TLS appropriately, including adding the trusted client certificates to the truststore. For more information, refer to the Keycloak documentation.
Configure Kong Gateway
-
Create a service:
curl -i -X POST http://localhost:8001/services \ --data "name=openid-connect" \ --data "url=https://httpbin.konghq.com/anything" -
Create a route:
 curl -i -X POST http://localhost:8001/services/openid-connect/routes \
   --data "name=openid-connect" \
   --data "paths[]=/"
Set up the authorization code flow
The following examples are built with simplicity in mind, and are not meant for a production environment. Because
httpbin.konghq.comis the upstream service in these examples, we highly recommended that you do not run these examples with a production identity provider as there is a high chance of leaking information. The examples also use the plain HTTP protocol, which you should never use in production.
Using the Keycloak and Kong Gateway configuration from the prerequisites, set up an instance of the OpenID Connect plugin.
For the demo, we’re going to set up the following:
- Issuer, client ID, and client auth: settings that connect the plugin to your IdP (in this case, the sample Keycloak app).
- Auth methods: authorization code flow and session authentication.
- Response mode: set to
form_postso that authorization codes won’t get logged to the access logs. - We want to preserve the original request query arguments over the authorization code flow redirection.
- We want to redirect the client to original request url after the authorization code flow so that
the
POSTrequest (because ofform_post) is turned to theGETrequest, and the browser address bar is updated with the original request query arguments. - We don’t want to include any tokens in the browser address bar.
With all of the above in mind, let’s test out the authorization code flow with Keycloak.
Enable the OpenID Connect plugin on the openid-connect service:
Test the authorization code flow
At this point you have created a service, routed traffic to the service, and enabled the OpenID Connect plugin on the service. You can now test the authorization code flow.
-
Check the discovery cache:
curl -i -X GET http://localhost:8001/openid-connect/issuersIt should contain Keycloak OpenID Connect discovery document and the keys.
-
Open the service page with some query arguments:
open http://localhost:8000/?hello=world -
The browser should be redirected to the Keycloak login page.
You can examine the query arguments passed to Keycloak with the browser’s developer tools.
-
And finally you will be presented a response from
httpbin.konghq.comthat looks something like this:{ "args": { "hello": "world" }, "headers": { "Authorization": "Bearer <access-token>", }, "method": "GET", "url": "http://localhost:8001/anything?hello=world" }
It looks rather simple from the user point of view, but what really happened is described in the diagram above.


